Showing posts with label sewing. Show all posts

Tuesday, July 9, 2013

Introducing Chasing Rainbows!

Hello friends!  I am so excited to show you what I've been up to lately.  I've been moving towards getting my new Etsy store up and running.  So now, I proudly present (would it be too much to ask for a drumroll?):


Currently, I have hobo bags, lunch bags and baby bibs for sale in my shop, but I have lots of other ideas floating around in my head that may show up soon.  All items have been handmade by yours truly.  I'd be so honored if you would go take a peek and tell me what you think!

Niki

Thursday, February 21, 2013

I'm a Softie for Softies!

Is there an age where you become to old to love plush toys?  If there is, I haven't hit it yet.  I still adore all things soft and huggable.  Cute animals, sweet dolls...They just can be so darn cute!  Especially the handmade ones.  If it's handmade, that totally takes it to the next level of cool!  Fortunately for softie lovers like me, plush toys can be very easy to make!  Here's a few patterns and tutorials that I've been drooling over.


First up is this cute, and super simple bunny.  Wouldn't this be perfect to stick in a kid's Easter basket?  Find the pattern and instructions here.


For those of you wanting a more unique project, may I present Plattie the Platypus? Here's the pattern and tutorial.


How cute are these foxes and raccoons from Ruffles and Stuff?  Her adorable pattern can be found here.


I'm slightly obsessed with Russian matryoshka dolls, so I cannot wait to make some of these babushka dolls.  They look super easy, so I'll probably end up making a whole set in different sizes, nesting doll style.  You can find the instructions here. (Note: there is a link to a paid pattern.)


Handmade softies make great gifts as they are very customizable, not to mention they can be a great way to use up fabric scraps!  Make some up for your favorite young people, or just make some for you.  You're never to old to enjoy a homemade softie.  (In my opinion!)

Niki

P.S.  Still want more?  Check out this great collection of soft animals and dolls at See Kate Sew.

Wednesday, October 24, 2012

Jumpsuit to Dress Refashion

 
So, as you may have seen in my post the other day, I thrifted this jumpsuit that I would shudder to see anyone wear.  But the print was kinda sweet, and the price was right, so I took it home with me and transformed it into a little dress.


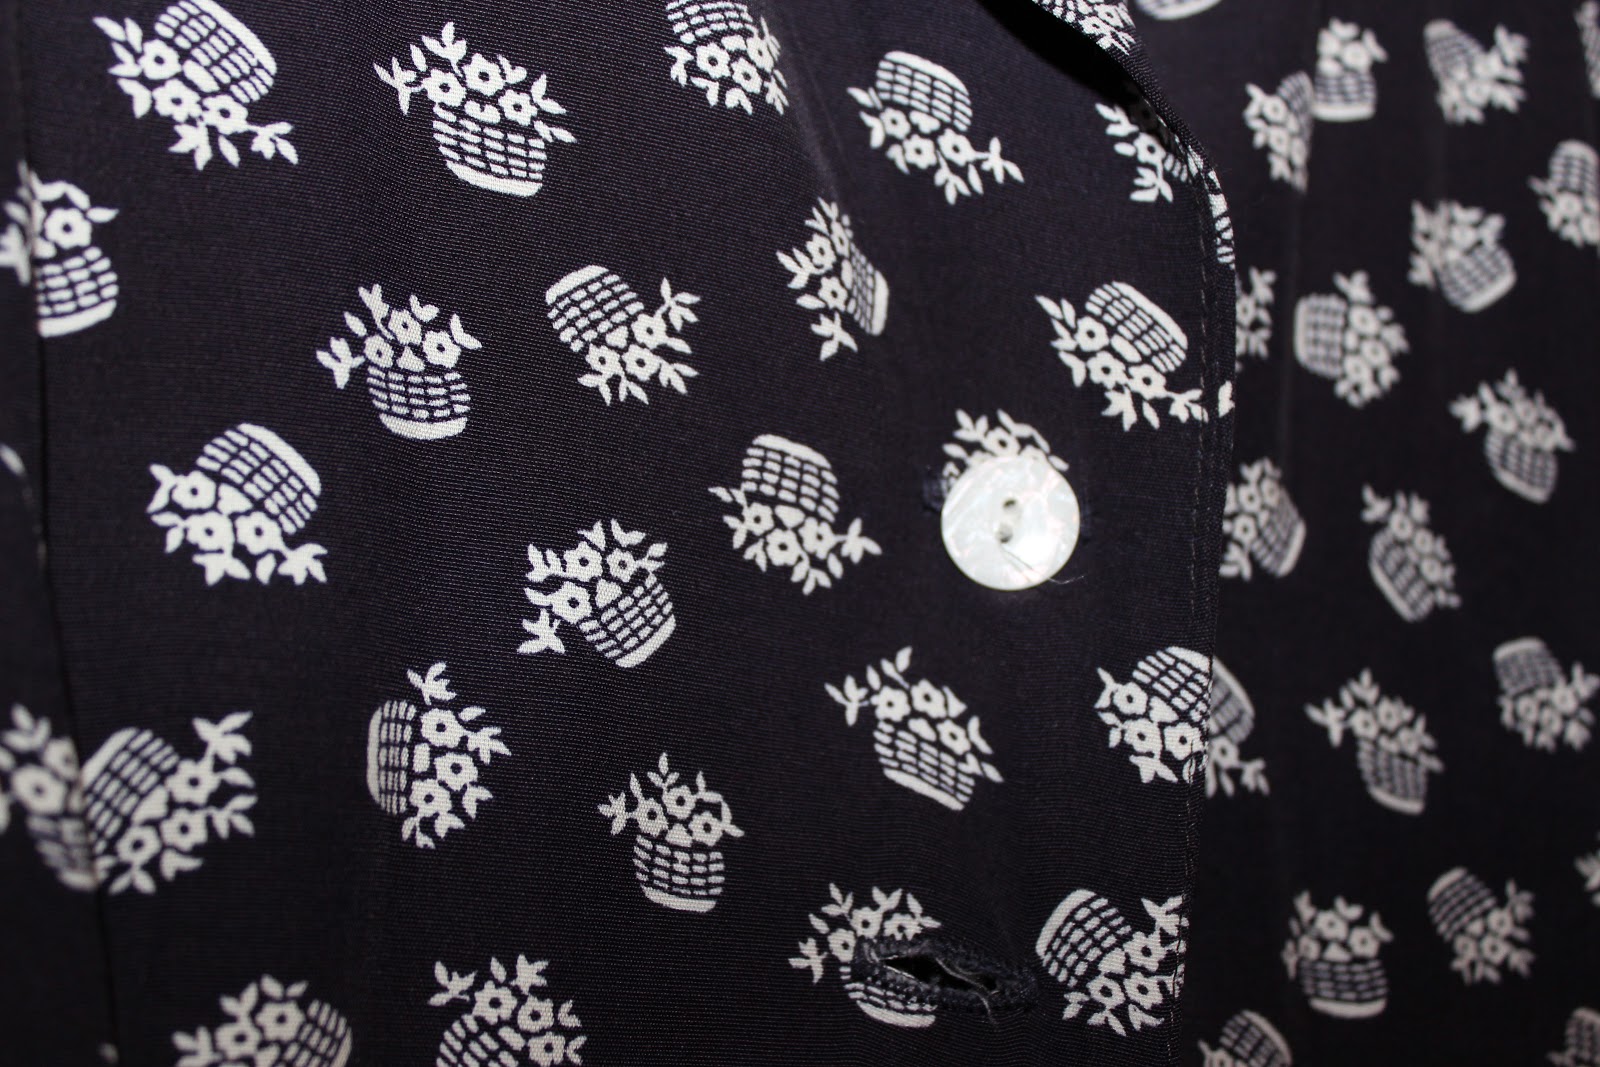
 See?  The print is a bunch of tiny little flower baskets.  Kinda cute.  But not when it's part of an outdated pantsuit with shoulder pads.  :P


Here's the finished product.  I made the pants into a skirt using the same method as in this post, then shortened the skirt to a more modern length.  I took in the sides a little and I cut off the sleeves, and changed the neckline by removing the collar.  I tried my hand at making some bias tape to finish the neckline with so that it would lay flat, and it came out ok.  Not wonderful, but better than my first try.  I also had to take the bottom button and move it up to the top because my neckline was higher than the original. 

Here's a back and side view of the finished dress.
 

Here's a closer picture of the bias tape neckline I made.  I don't know if you can see it very well or not.


So what do you think?  Should I add pockets to it somehow?  I'd also love to hear any styling ideas you guys have for this dress.  I'm still trying to figure out some ways to wear it without looking outdated.  Thoughts?

Niki

Monday, October 8, 2012

Scrap-Eating Elephant Tutorial

This is a cute and easy little project I whipped up one day.  I had been seeing all these adorable soft animals that other people had created, so I decided to make my own.  Here's how I did it.
 

What you will need:
-scrap fabric (I used cotton, but something softer would be fabulous too)
-needle
-thread
-scissors
-embroidery floss
-sewing machine (optional)

First, I free-handed an elephant onto my fabric. I based it off of a picture of a stuffed elephant, but it is a slightly different shape, especially the ears.  You'll need to cut 2 bodies and two ears.  This is great project for using up fabric scraps.


Pin one ear piece onto one of the body pieces.  You can do a tiny hem around the edge first, like I did, or leave the edges raw. 


Sew the ear onto the body piece.  I used a zig-zag stitch in a contrasting color.  Repeat for the other ear/side.


Pin your two body pieces (with attached ear pieces) with the right sides together.  At this point, you can give the elephant a tail and/or hair made out of yarn.  Just tuck them inside so that they're on the outside after you turn it.   Sew around the edge, leaving a small section open.


Turn your paciderm friend right side out.  I left the opening in the place where a mouth would have been.  You'll see why in a second.  :)


Embroider an eye on each side. 


This is why I left the mouth open.  So I could "feed" him scraps.  ;)  I decided to stuff my elephant with fabric scraps from the sewing projects I was working on, instead of using stuffing.  So it lived on my sewing table to eat my scraps until it was full.  So eco-friendly, right?  But don't be surprised if you start sewing more, and cutting things more generously just so that you can fill up your new friend faster.  :)


Once your elephant has had his fill of fabric scraps, stitch up the opening with a needle and thread.


And he's done!  You can also fill this little fella with stuffing if you want it to be softer and more squishable.  It would be an adorable gift for a baby or younger child.  :)


I haven't decided what to name it yet.  Any suggestions?  Ellie or Ollie are the obvious choices.

Niki

Saturday, October 6, 2012

Floral Dress to Skirt Refashion

I'm super excited to share my lastest refashion with you!  It's one of my favorites to date, and I can't wait to wear it tomorrow! 


I started out with this dress that I thrifted years ago when I needed something for a party. I wore it once, maybe twice, then it stayed at the back of the closet. Even though it fits me now, and it's a perfectly good dress, it just didn't love the way it looked on me. Empire waists aren't my most flattering look, unfortunately. However, I still loved the floral sheer fabric.


So out came the scissors. I chopped off the top of the dress under the waistband. I realized that the two layers of the dress were not the same width, which would have made it tricky to create a waistband, so I decided to fully seperate them. I had to cut around the pesky side zipper to take it out, but it all worked out in the end. :)

 
I started by making the inner lining into a sort of slip. I trimmed off the top where I had cut out the zipper.


Sheers can be tricky to work with, especially if you don't have a serger, but I just sewed a tiny hem around the top of the slip, then folded that over again  to make a casing for the elastic.  I used a thin elastic, probably 3/8" or so.  That's what I had on hand.  I threaded the elastic through the tunnel I had made, and sewed up the ends.  Then I finished sewing the casing closed.


For the overskirt, I had to close up the side seam where I had removed the zipper.


Then I repeated the same steps process as for the slip to make a casing for my elastic.  For the overskirt, I used a wider elastic.  I think it was 1" wide.  I didn't have to hem the bottom of either skirt, because I left the original hem intact.  That was nice.  :)


There you go.  A slip, a skirt and a sash all from one dress!  For the sash, I just cut the ties off the dress and sewed them together.  I can tie it in a bow in the back, on the side or even in my hair.  :)


I love, love, love the way this turned out!  It's floral and feminine, and the darker colors are perfect for fall!  Plus, I adore the way the sheer fabric drapes and swishes.   I think I may be a little too excited about this refashion.  I'll try to do an outfit post tomorrow when I wear it to church.  :)

Niki

Tuesday, October 2, 2012

Monkeying Around


As you can see, I found my camera card.  It was right in the computer where I left it.  I feel super intelligent now.  But one other camera card really IS missing.  ;P 

Anyway, here's a few quick pictures of the sock monkey I made the other day.  I just followed instructions that I looked up online.  It was fun to make.  Now I have to wait 2 weeks to give it to my little sis for her birthday.  I hope she likes it.  :)

Have you ever made a sock monkey?

Niki

Sunday, September 30, 2012

The Bunny, The Bunny, Woah, We Made The Bunny

 If you didn't get the title of this post, you haven't watched enough Veggie Tales in your life.  ;)  Anyway, this is the bunny that I helped my sister make.  I've been teaching her to sew the past week, because she's constantly asking me to make things for her.  I figured if I could teach her to sew, then she could make things whenever she wants!  We started with a circle skirt, but she's already gone on to make a knit maxi skirt for herself, 2 doll skirts and this bunny.  I think she's a natural.  :D


We got the idea from Elena at Randomly Happy, but added some details of our own, like the fuzzy yard pom-pom tail.   Oh, and we added an embroidered nose after I took the pictures.  We used a scrap of fleece I had in my fabric box, and cotton fabric for the inside of the ears.  It's a gift for our little sister, who happens to love pink.  Go figure.  ;)  I think it's cute, and it would be a great thing to make for a baby.


I'm also making a sock monkey for the same sister out of some old socks that no one liked to wear.  I know it only has 1 arm right now, but it's in progress.  I'm gonna go work on it some more now.  We'll see how it turns out.  I kinda love sock monkeys.  :)

 
And just so we don't end with a creepy, half-done monkey picture, here's a picture of what I wore today.  I've had this skirt for years, way before polka dots were cool.  It finally fits me again.  *happy dance*  And this denim jacket seriously goes with everything.  I'm gonna wear it constantly this fall.  One of the best $3 of my life. 
 
Hope you all had a wonderful Sunday!
 
Niki
 
Skirt: thrifted from Goodwill.  Ruffled Shirt: Old Navy.  Jacket: thrifted.  Shoes (not seen): thrifted.

Monday, September 24, 2012

Heart Sweatshirt with Elbow Patches Refashion

I bought this gigantic old sweatshirt at a thrift store for an 80's party.  I cut the neckline wider so I could wear it off the shoulder and wore it to the party.  Then it sat in my closet because it was much to huge and ugly to wear.  So, refashionista that I am, I decided to give it a makeover!


Here's what you'll need to try this for your self:
  • 1 sweatshirt/hoodie/sweater that needs a facelift
  • a 1/4 of a yard or so of a contrasting fabric
  • sewing machine or needle and thread
  • pins
  • scissors
First, if your sweatshirt is too big, like mine, you'll want to size it down.  Put it on inside out and pin it to the size you want it.  Sew along where you pinned to take it in and trim.  I also cut off the bottom band of the sweatshirt, but this isn't necessary.  You could also cut off the cuffs of the sleeves if desired.
 
Once your sweatshirt fits the way you like it, cut a large heart or other shape out of your contrasting fabric.  This is a great way to use up scraps!
 
Pin the heart to the sweatshirt, making sure it is centered.  (Mine's a little off...)  Zig-zag around the heart to attach it to the sweatshirt.  You could also use that iron-on fusible web stuff if you didn't want to sew it. 
 
 
As you can see, I zig-zagged around the large heart twice, without bothering to hem the edges.  Another option for the heart would be to just paint one on with fabric paint.  In fact, that was my original plan, but I ran out of paint.  So I covered it up with fabric.  And I like it better this way anyway.  :)
 
For the elbow patches, try on your sweatshirt and bend your elbow.  Mark the center of your elbow with a pin or a pen.  Cut two smaller hearts from your fabric and pin them on.  Center the hearts on the marks on the elbows of the shirt and pin them on.  Attach them as desired.  I used my sewing machine, but it was a little tricky, so I might recommend hand-sewing the patches on.
 
That's it!  Another easy refashion!


I'm kind of in love with the elbow patches.  Definitely makes the whole thing.  I want to sew elbow patches on all of my shirts now.  :)
 
I turned this giganto 80's sweatshirt into something I'll actually wear this fall and winter.  I'd call that a success!  What do you think?  Would you try this refashion?
 
Niki
 
Recycled Fashion

Friday, September 14, 2012

Granny Shorts Refashion


Behold!  The "granny" shorts!  Actually, I've been on the hunt for "granny" shorts ever since I saw this post from 49 Dresses.  I thought that the skirt she made was so cute, and I loved the fact that it had pockets!  So when I spotted these red denim shorts in my size at the thrift store yesterday, I snagged them.  They're fairly awful as shorts, unless you're creating a Mickey Mouse costume, but I knew that they'd be an adorable skirt.  So this morning I got to work.


Step 1 is to take apart the center seam using a seam ripper or scissors.  Scissors are easier.  :)  To clarify, you want to rip the seam that goes from the inside of 1 leg to the other. 


You should then be able to lay it out like this, with "J" shapes in the front and back and the side seams in the center.  (Note the gigantic pockets.  Bonus!  Who doesn't love skirts with pockets?)

 
Pin it in a line (slightly angled) and sew down.  The idea is to get the "J" shape to go away.  So you're sewing straight down, but not quite.  Clear as mud?  Maybe you should go over to 49 Dresses for a second.  Her post has a good diagram.  My picture above isn't exactly how I ended up sewing it.  I had to fix the angles a little.
 
 
This brings me to an important point.  Try it on before you cut off the excess fabric!!!  I have learned this valuable lesson from past refashions.  Once you trim the seam, you're commited, so make sure you like it how it is.  When I tried mine on, it was doing something strange in the back, so I took it off and tried again.  My refashions involve many trips to the bathroom or bedroom to try things on in front of a mirror to see if I like how it's fitting, ect.


Once you've got the front and back the way you like them, you're pretty much done.  Trim off the extra "J" fabric and finish the seams however you like.  You could serge them, zig-zag or leave it the way it is.  I zig-zagged along my hem, then did some top stitching on the new seams I had created to make them match the rest of the skirt.  At this point, you could add back pockets, adjust the length, whatever you want.  It's really up to you.  :)


The finished front...


...and back.

 
Wear your skirt with pride and no one will ever guess its humble beginnings as "granny" shorts unless you tell them.  If you do tell them, they'll probably be very impressed with your refashioning abilities.  ;)

If you have any questions, or need me to clarify any of my instructions, please let me know!

Niki