Showing posts with label DIY. Show all posts

Monday, January 14, 2013

Who's Who: Key Edition

A few weeks after I got my job, I was handed a set of keys.  These keys looked exactly the same, but they went to different doors.  For the first day or so, I had to look at the little tiny words stamped on the keys to be able to tell them apart.  So I took them home and painted them different colors.  It worked great, but the paint (or nail polish, rather) has chipped so I had to repaint them today.  So, like any good blogger, I took pictures of the process to show the world and help out any who may be having the "Help, my keys are identical twins!" problem.  :)
 
Step 1: Gather supplies.  You'll need your keys, nail polish (a different color for each key, obviously), topcoat and something to protect your work surface from clumsiness.  Oh, you'll also want a movie to watch, book to read, or some other project to work on while things are drying.
 
 (See?  I told you they were hard to tell apart.)

Step 2: Paint the keys like you would paint your nails!  Let one side dry, then flip it over and do the other side.  You may want to do multiple coats, it's up to you.  Personally, I added a layer of glitter nail polish to one of mine for some extra bling.  This step is when you'll need another source of entertainment, because waiting for all those coats to dry gets boring.

 
 Step 3 is optional. I just added a topcoat to my keys to hopefully extend the life of the nail polish.  This project is really just like doing your nails.
 

This is a super basic project, and I'm sure y'all are smart enough to think of it, and figure out how to do it without my help, but I thought I'd post anyway.  Because I'm a blogger, and it's what we do.  ;)

Niki

Sunday, November 11, 2012

DIY Smashbook Tutorial

Have you heard of "smashbooking"?  The idea is you just "smash" whatever you like into a "Smashbook", which you can buy at a craft store/online, ect.  The official product/brand name is actually "Smashbook"  but it's sort of turned into an adjective.  "Smashbooking" is like scrapbooking, without all the fancy shmancy stuff.  It's an art journal/scrapbook/diary/ect.  I stumbled across the idea a few days ago (ok, it was yesterday) and it looked fun.  I wanted to start my own book, but being the cheap crafty person I am, I decided to make my own.
 
Here's what you'll need to follow my method:
  • A spiral bound notebook
  • Paper (more on that later)
  • Scissors
  • A single hole punch
  • Your creativity


Remove the metal binding piece from the notebook. 


Use one of the notebook's original pages as a template to cut out a bunch of fun pages in the right size.  I used old sheet music, scrapbook paper, coloring sheets and some envelopes.  I just remembered that I was going to use old book pages too.  Use whatever you want to make your smashbook unique and fun for you!   Have fun with it!  That's the whole point.  For reals.  Just have fun.


By the way, his project is a great way to use up some of that pretty paper you've been hoarding saving.  I had a bunch of paper left in the notebook, so I only cut out paper for accent type pages.  If your notebook was all used up, you could replace all the pages with "pretty" ones.  :)


Now it's time to get out the hole puncher.  Put one of the original notebook pages on top of the pages you want to punch and use the holes as a guide.  This way your pages will line up right.  Keep in mind, if you have two pages you want to face each other, punch them accordingly.  It's kind of like sewing.  Put the right sides together and then punch them at the same time.  The holes will end up on opposite sides.  I don't know if that makes sense, but you're smart.  You'll figure it out.  ;)


Reassemble your notebook!  I spaced my "pretty" pages with the plain ones that came in the notebook, but I tried to keep it as random and unplanned as possible.  One of my quirks is that I have a hard time doing anything randomly, like laying out a quilt or a scrapbook page.  It may look random when it's done, but you can bet I made sure that two of the same colors weren't together, ect.  I almost use a formula when doing something "randomly."  Ha!


After I put everything back together, I went through and added a few little embellishments to some of the pages to act as journal prompts, ect.  Again, I tried to not think about where I was putting things too much.


Here's a shot of the finished notebook.  It's ready to be "smashed!"  I'm looking forward to filling it with all the little things that I have a hard time throwing away.  Tickets, cards, pretty magazine clippings, ect.  Hopefully it'll be a good way to get back into journaling as well. 

And can I just say, I love making things?  It was so therapeutic to cut and glue and make hole punch confetti this afternoon/evening.  I needed to do something like that after being crazy busy this weekend.  I think "smashbooking" will be a great way to unwind after work.

Do you "smashbook?"

Niki

P.S.  For more smashbook information/inspiration, try searching Google or Pinterest!

Wednesday, October 24, 2012

Jumpsuit to Dress Refashion

 
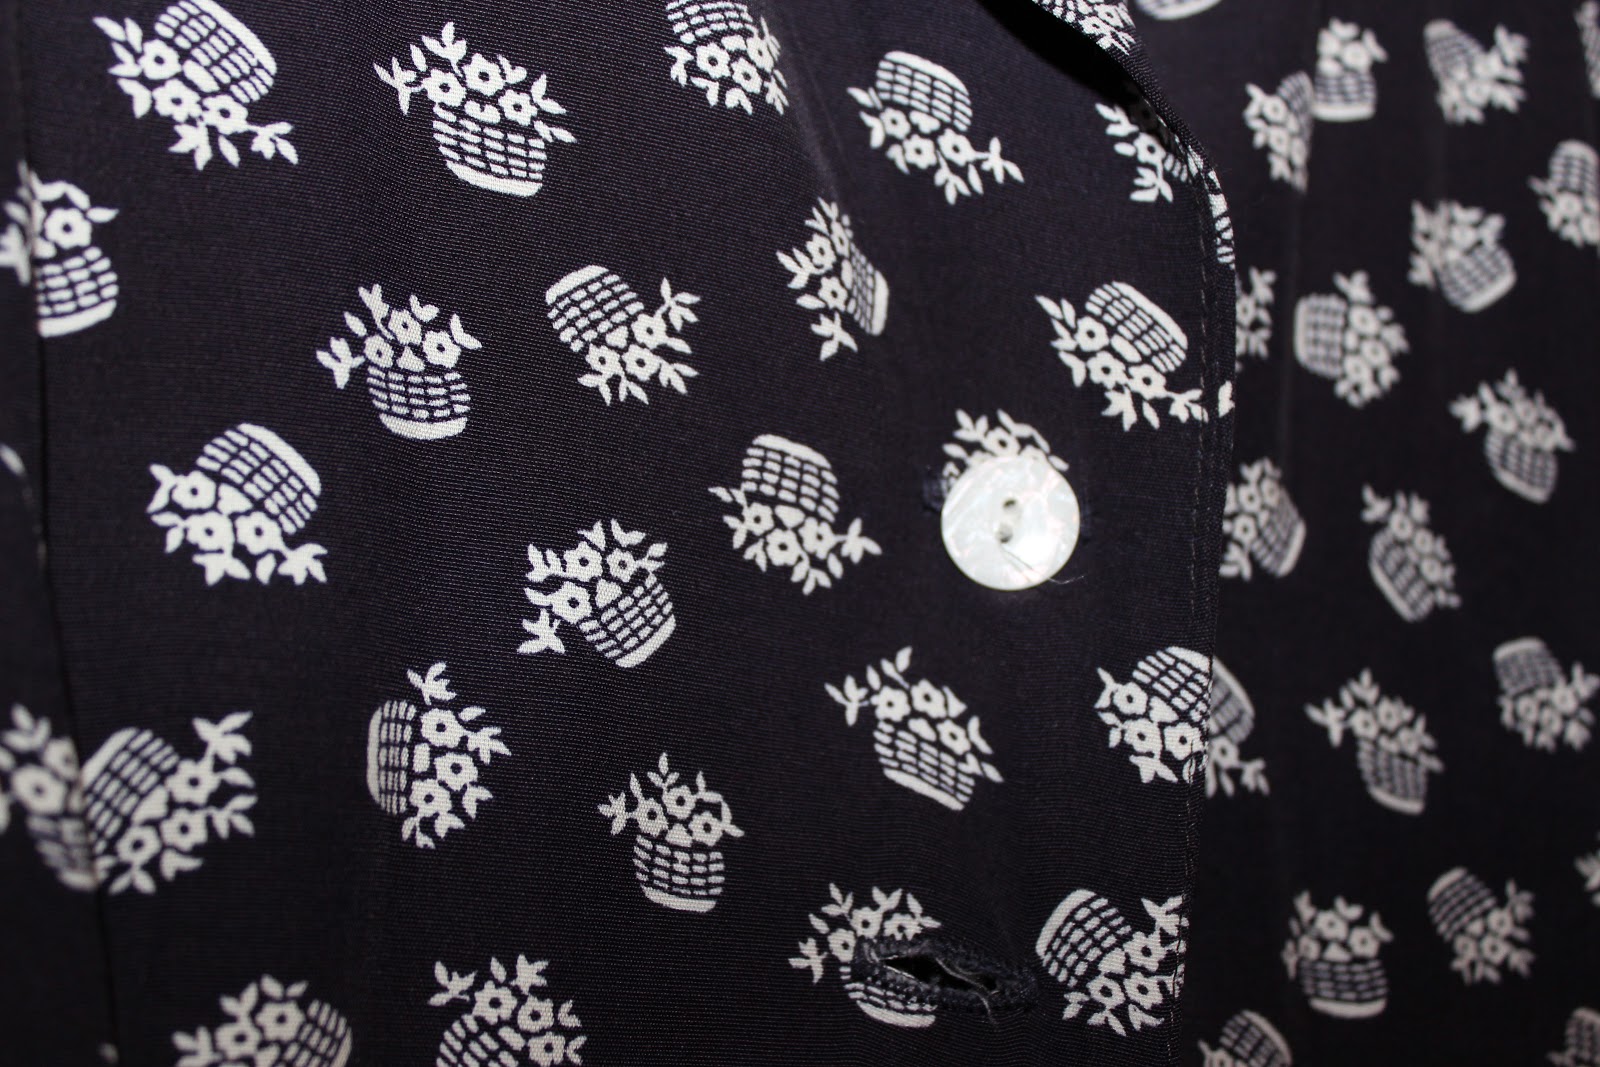
So, as you may have seen in my post the other day, I thrifted this jumpsuit that I would shudder to see anyone wear.  But the print was kinda sweet, and the price was right, so I took it home with me and transformed it into a little dress.


 See?  The print is a bunch of tiny little flower baskets.  Kinda cute.  But not when it's part of an outdated pantsuit with shoulder pads.  :P


Here's the finished product.  I made the pants into a skirt using the same method as in this post, then shortened the skirt to a more modern length.  I took in the sides a little and I cut off the sleeves, and changed the neckline by removing the collar.  I tried my hand at making some bias tape to finish the neckline with so that it would lay flat, and it came out ok.  Not wonderful, but better than my first try.  I also had to take the bottom button and move it up to the top because my neckline was higher than the original. 

Here's a back and side view of the finished dress.
 

Here's a closer picture of the bias tape neckline I made.  I don't know if you can see it very well or not.


So what do you think?  Should I add pockets to it somehow?  I'd also love to hear any styling ideas you guys have for this dress.  I'm still trying to figure out some ways to wear it without looking outdated.  Thoughts?

Niki

Monday, October 8, 2012

Scrap-Eating Elephant Tutorial

This is a cute and easy little project I whipped up one day.  I had been seeing all these adorable soft animals that other people had created, so I decided to make my own.  Here's how I did it.
 

What you will need:
-scrap fabric (I used cotton, but something softer would be fabulous too)
-needle
-thread
-scissors
-embroidery floss
-sewing machine (optional)

First, I free-handed an elephant onto my fabric. I based it off of a picture of a stuffed elephant, but it is a slightly different shape, especially the ears.  You'll need to cut 2 bodies and two ears.  This is great project for using up fabric scraps.


Pin one ear piece onto one of the body pieces.  You can do a tiny hem around the edge first, like I did, or leave the edges raw. 


Sew the ear onto the body piece.  I used a zig-zag stitch in a contrasting color.  Repeat for the other ear/side.


Pin your two body pieces (with attached ear pieces) with the right sides together.  At this point, you can give the elephant a tail and/or hair made out of yarn.  Just tuck them inside so that they're on the outside after you turn it.   Sew around the edge, leaving a small section open.


Turn your paciderm friend right side out.  I left the opening in the place where a mouth would have been.  You'll see why in a second.  :)


Embroider an eye on each side. 


This is why I left the mouth open.  So I could "feed" him scraps.  ;)  I decided to stuff my elephant with fabric scraps from the sewing projects I was working on, instead of using stuffing.  So it lived on my sewing table to eat my scraps until it was full.  So eco-friendly, right?  But don't be surprised if you start sewing more, and cutting things more generously just so that you can fill up your new friend faster.  :)


Once your elephant has had his fill of fabric scraps, stitch up the opening with a needle and thread.


And he's done!  You can also fill this little fella with stuffing if you want it to be softer and more squishable.  It would be an adorable gift for a baby or younger child.  :)


I haven't decided what to name it yet.  Any suggestions?  Ellie or Ollie are the obvious choices.

Niki

Saturday, October 6, 2012

Floral Dress to Skirt Refashion

I'm super excited to share my lastest refashion with you!  It's one of my favorites to date, and I can't wait to wear it tomorrow! 


I started out with this dress that I thrifted years ago when I needed something for a party. I wore it once, maybe twice, then it stayed at the back of the closet. Even though it fits me now, and it's a perfectly good dress, it just didn't love the way it looked on me. Empire waists aren't my most flattering look, unfortunately. However, I still loved the floral sheer fabric.


So out came the scissors. I chopped off the top of the dress under the waistband. I realized that the two layers of the dress were not the same width, which would have made it tricky to create a waistband, so I decided to fully seperate them. I had to cut around the pesky side zipper to take it out, but it all worked out in the end. :)

 
I started by making the inner lining into a sort of slip. I trimmed off the top where I had cut out the zipper.


Sheers can be tricky to work with, especially if you don't have a serger, but I just sewed a tiny hem around the top of the slip, then folded that over again  to make a casing for the elastic.  I used a thin elastic, probably 3/8" or so.  That's what I had on hand.  I threaded the elastic through the tunnel I had made, and sewed up the ends.  Then I finished sewing the casing closed.


For the overskirt, I had to close up the side seam where I had removed the zipper.


Then I repeated the same steps process as for the slip to make a casing for my elastic.  For the overskirt, I used a wider elastic.  I think it was 1" wide.  I didn't have to hem the bottom of either skirt, because I left the original hem intact.  That was nice.  :)


There you go.  A slip, a skirt and a sash all from one dress!  For the sash, I just cut the ties off the dress and sewed them together.  I can tie it in a bow in the back, on the side or even in my hair.  :)


I love, love, love the way this turned out!  It's floral and feminine, and the darker colors are perfect for fall!  Plus, I adore the way the sheer fabric drapes and swishes.   I think I may be a little too excited about this refashion.  I'll try to do an outfit post tomorrow when I wear it to church.  :)

Niki

Tuesday, October 2, 2012

Monkeying Around


As you can see, I found my camera card.  It was right in the computer where I left it.  I feel super intelligent now.  But one other camera card really IS missing.  ;P 

Anyway, here's a few quick pictures of the sock monkey I made the other day.  I just followed instructions that I looked up online.  It was fun to make.  Now I have to wait 2 weeks to give it to my little sis for her birthday.  I hope she likes it.  :)

Have you ever made a sock monkey?

Niki

Sunday, September 30, 2012

The Bunny, The Bunny, Woah, We Made The Bunny

 If you didn't get the title of this post, you haven't watched enough Veggie Tales in your life.  ;)  Anyway, this is the bunny that I helped my sister make.  I've been teaching her to sew the past week, because she's constantly asking me to make things for her.  I figured if I could teach her to sew, then she could make things whenever she wants!  We started with a circle skirt, but she's already gone on to make a knit maxi skirt for herself, 2 doll skirts and this bunny.  I think she's a natural.  :D


We got the idea from Elena at Randomly Happy, but added some details of our own, like the fuzzy yard pom-pom tail.   Oh, and we added an embroidered nose after I took the pictures.  We used a scrap of fleece I had in my fabric box, and cotton fabric for the inside of the ears.  It's a gift for our little sister, who happens to love pink.  Go figure.  ;)  I think it's cute, and it would be a great thing to make for a baby.


I'm also making a sock monkey for the same sister out of some old socks that no one liked to wear.  I know it only has 1 arm right now, but it's in progress.  I'm gonna go work on it some more now.  We'll see how it turns out.  I kinda love sock monkeys.  :)

 
And just so we don't end with a creepy, half-done monkey picture, here's a picture of what I wore today.  I've had this skirt for years, way before polka dots were cool.  It finally fits me again.  *happy dance*  And this denim jacket seriously goes with everything.  I'm gonna wear it constantly this fall.  One of the best $3 of my life. 
 
Hope you all had a wonderful Sunday!
 
Niki
 
Skirt: thrifted from Goodwill.  Ruffled Shirt: Old Navy.  Jacket: thrifted.  Shoes (not seen): thrifted.

Wednesday, September 26, 2012

The Quest for the Terrarium

 
I keep seeing pictures of cute terrariums and mini gardens.  I wanted one.  So I decided to try my hand at it.  It was an adventure.  First of all, I needed a jar or bowl, so I found one in my sister's fort (she said I could use it) that was full of rotting vegetation of some sort.  I cleaned it out and put some pepples and dirt in it.  Then I needed to find my plants.
 
 
But I got sidetracked taking pretty pictures. 


And making new friends.
 
 
And walking through and taking pictures of spider webs all aglow in the afternoon sun.
 
 
I found some moss and a little sprig of something to plant in my jar.   I gave it a little water and brought it inside.
 
 
Then I searched the house for little things to inhabit my terrarium.  I found a little bunny and Piglet.  Perfect.  And a bottle cap for good measure, just cuz I love bottle caps.  One of my weird obsessions.
 
 
Now my mini garden lives on my bedside table.  We'll see if it thrives or dies.  But making it was sure a fun use of an afternoon.  Because in my heart, I will always be a country girl who loves traipsing around in nature with only her imagination for a companion, discovering beautiful things that her Creator has made.  And having a little piece of the beautiful indoors by my bed sounds lovely too.  :)
 
Niki
 
P.S. Sorry for waxing poetic/nostalgic/sappy at the end there.  ;)